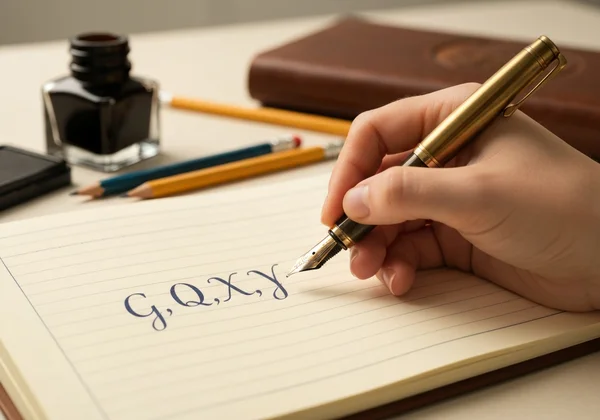
Dominando as Letras Cursivas Minúsculas Difíceis: G, Q, X, Y no Alfabeto Cursivo
Está com dificuldades em algumas letras cursivas minúsculas? Você não está sozinho! Muitos aprendizes descobrem que, enquanto letras como a ou c são fáceis, alguns caracteres difíceis podem interromper o fluxo. As letras cursivas minúsculas g, q, x e y atrapalham muitos estudantes. Seus loops, caudas e conexões causam verdadeira frustração.
Já se perguntou como finalmente acertar essas letras? Este guia vai te ajudar. Vamos decompor cada letra passo a passo, mostrando exatamente como formá-las corretamente. Também abordaremos armadilhas comuns a evitar e compartilharemos dicas essenciais de prática para aumentar sua confiança.
Acompanhe este guia, e essas letras irritantes logo fluirão direto da sua caneta. Para prática prática, você pode encontrar exercícios práticos abrangentes e ferramentas interativas para cada letra do alfabeto em nosso portal de recursos.
Como Escrever o Cursivo 'G' com Facilidade: Um Guia Passo a Passo
A letra cursiva minúscula g é elegante, combinando uma forma oval familiar com um loop descendente distintivo. Dominá-la é fundamental para escrever palavras como good, give e again de forma fluida. Vamos decompor.
Decompondo os Traços do Cursivo Minúsculo 'G'
-
Comece com a Cabeça: Comece exatamente como faria para um cursivo a ou o. Inicie na base da escrita, suba até o meio da folha, curve ao redor para formar um oval e feche-o no ponto de partida.
-
Crie o Loop Descendente: Quando o oval estiver fechado, não levante a caneta. Trace uma linha reta para baixo a partir do lado direito do oval, indo bem abaixo da base da escrita.
-
Cruze e Conecte: Na parte inferior da descida, crie um loop suave que se inclina para a esquerda, cruzando o traço descendente na base da escrita. Termine com um traço de saída ascendente, pronto para conectar à próxima letra.
Erros Comuns com o 'G' e Como Corrigi-los
-
Erro 1: O Loop Aberto. O loop abaixo da base da escrita não está totalmente fechado ou cruza muito alto.
Solução: Concentre-se em fazer seu traço descendente longo o suficiente antes de iniciar o loop. Tente cruzar o traço diretamente na base da escrita. -
Erro 2: O Oval Amassado. A parte superior parece plana em vez de um círculo ou oval adequado.
Solução: Pratique as formas de o e a primeiro para desenvolver a memória muscular da forma arredondada perfeita. -
Erro 3: Tamanho Incorreto. O loop descendente é muito grande e colide com letras na linha inferior, ou muito pequeno e parece um y.
Solução: Mantenha o loop descendente com a mesma altura do corpo da letra.
Dicas de Prática para o Cursivo 'G'
Consistência é tudo. Dedique alguns minutos diários à prática da letra g. Escreva-a isolada, depois em palavras simples. Para exercícios estruturados, uma planilha de prática é sua melhor amiga. Você pode encontrar uma folha de exercícios gratuita dedicada ao g para orientar sua prática e desenvolver memória muscular.
Dominando o Cursivo Minúsculo 'Q': Análise Detalhada e Prática
O cursivo q costuma ser confundido com g devido à estrutura semelhante. Contudo, sua cauda varre na direção oposta, conferindo-lhe um acabamento único e gracioso. Dominar esta letra é essencial para palavras como quick, quiet e queen.
Entendendo os Traços Únicos do Cursivo 'Q'
-
Forme o Oval: Comece exatamente como faria para um cursivo a ou g. Inicie na base da escrita, suba e forme um oval fechado.
-
A Descida Reta: A partir do lado direito do oval, desenhe uma linha reta diretamente para baixo, passando abaixo da base da escrita. Diferente do g, esta descida não é curva.
-
A Cauda Varre para Frente: Em vez de fazer um loop para a esquerda, a cauda do q varre para frente e para a direita. Crie um pequeno "check" ou curva ascendente que não cruza o traço descendente. Esse movimento para a frente prepara a conexão com a próxima letra.
Dificuldades Comuns com o 'Q' e Soluções
A principal dificuldade do cursivo q está na cauda. Muitos aprendizes instintivamente tentam fazer o loop para trás como um g.
-
A Confusão com o 'G': Se seu q parece um g, você está fazendo o loop na direção errada.
Solução: Enquanto escreve, repita mentalmente: "Q vai para a frente". Foque naquele pequeno movimento para a direita. -
Um Visual Desconectado: A cauda pode parecer um traço separado em vez de parte fluida da letra.
Solução: Vá mais devagar. Garanta que a caneta não pare após o traço descendente. Deve ser um movimento contínuo do fundo da descida até a cauda ascendente.
Ferramentas de Prática para o Cursivo 'Q'
Para diferenciar realmente o q do g, você precisa de repetição. Traçar e praticar à mão são indispensáveis. Nossa plataforma oferece exercícios práticos para ajudá-lo a dominar o movimento único da cauda
Mastering Cursive 'X' Practice for Fluid Penmanship
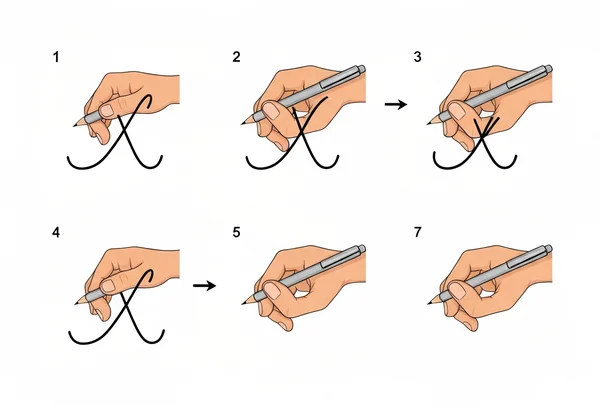
The lowercase cursive 'x' is an oddity because it often requires you to lift your pen. This break in flow can be tricky, but once mastered, it adds a sharp and distinct character to your writing.
How to Form the Lowercase Cursive 'X'
The cursive 'x' is best thought of as two separate but coordinated strokes.
-
The First Stroke: Start at the baseline and make an upward, curved stroke that looks like the first half of a lowercase 'n'. It should arch up to the midline and then come straight back down to the baseline. Keep your pen on the paper.
-
Lift and Cross: Now, lift your pen. Move it to the top left, near the midline, and draw a straight or slightly curved line that crosses through the middle of your first stroke.
Why Cursive 'X' Can Be Tricky and How to Fix It
The main challenge is the pen lift. It breaks the rhythm of cursive writing.
- Misaligned Cross: The second stroke often crosses too high, too low, or at the wrong angle.
- Solution: Aim for the dead center of the first stroke. Think of it as crossing a 't', but diagonally.
- Poor Connections: Connecting to the letter after 'x' can feel awkward.
- Solution: Modern cursive often allows the second crossing stroke to finish with a small upward flick, which serves as the connector. Practice connecting 'x' to common letters like 'e' and 'i'.
Practice Your Cursive 'X'
Because it's so different, the cursive 'x' requires focused practice. Repetition helps you judge the pen lift and cross-stroke placement automatically. Get your free cursive 'x' worksheet to build confidence and consistency.
Your Guide to Perfecting Cursive 'Y' with Worksheets & Drills
The cursive 'y' is another letter with a descending loop, similar to 'g'. However, its entry stroke and the shape of its loop are slightly different, giving it a more open and flowing appearance.
Forming a Beautiful Cursive 'Y'
The cursive 'y' is like combining a 'u' with the loop of a 'g'.
- The 'U' Shape Entry: Start at the baseline and form the first part of a cursive 'u'. Sweep up to the midline, curve down to the baseline, and then sweep back up to the midline again.
- The Descending Loop: From the midline, trace straight down, going below the baseline to create the descending loop.
- Cross and Connect: As with the 'g', loop back to the left, cross the downward stroke at the baseline, and finish with an exit stroke ready to connect.
![Step-by-step guide for writing l)
Common 'Y' Mistakes to Avoid
- Mistake 1: Starting Like an 'I'. Some writers start with a straight upstroke instead of the curved 'u' entry. This makes the letter look stiff.
- Solution: Always begin by thinking "u". That initial dip and curve are essential to the letter's form.
- Mistake 2: A Closed Top. The 'u' part is closed, making the letter look like a 'g' with a strange entry.
- Solution: Ensure there is a visible valley in the 'u' shape at the top before you begin your descent.
Practice Tools for the Cursive 'Y'
Drilling the cursive 'y' helps distinguish its unique form from other looped letters. Use our online practice tools to trace the letter and practice writing it in words. This interactive feedback helps correct mistakes in real-time.
General Tips for Tackling Tricky Lowercase Cursive Letters
Mastering individual letters is the first step. These overarching tips will help you integrate them smoothly into your overall handwriting.
The Power of Consistent, Mindful Practice
You don't need to practice for hours. Just 10-15 minutes of focused, mindful practice each day is more effective than a single long session once a week. This consistency builds muscle memory, which is the key to fluid, automatic handwriting.
Optimizing Your Pen Grip and Posture for Better Flow
How you sit and hold your pen has a huge impact on your writing.
- Posture: Sit up straight with your feet flat on the floor. Don't hunch over your desk.
- Pen Grip: Grip the pen lightly: thumb and index finger on top, middle finger below. Skip the tight squeeze—it leads to fatigue and shaky lines.
- Use Your Arm: Good cursive comes from the arm, not just the fingers. Try to move your entire forearm as you write, allowing for smoother, more connected strokes.
Using Free Cursive Worksheets and Tools for Continuous Improvement
Learning cursive is a journey, and having the right resources makes all the difference. Our website is a comprehensive hub designed to support learners of all ages.
- A-to-Z Worksheets: Find printable worksheets for every single letter, both uppercase and lowercase.
- Interactive Generator: Have fun with our Cursive Font Generator. Type in any text and see it instantly transformed into beautiful script. It's a great way to study letter connections.
- Quizzes: Test your knowledge and track your progress with fun, interactive quizzes.
Ready to improve? Explore all resources and start your journey to beautiful handwriting today.
Your Journey to Cursive Fluency Starts Now!
Conquering tricky lowercase cursive letters like 'g', 'q', 'x', and 'y' is not about talent; it's about understanding the mechanics and committing to practice. By breaking each letter down into simple strokes, recognizing common mistakes, and using effective practice materials, you can transform these points of frustration into sources of pride.
Remember, every expert was once a beginner. Be patient with yourself, celebrate small victories, and use the tools available to you. Your journey to fluent, elegant cursive handwriting is well underway.
Visit our site now to download your free practice worksheets, try our font generator, and access all the resources you need to succeed. Happy writing!
Frequently Asked Questions About Tricky Lowercase Cursive Letters
Why are certain lowercase cursive letters like G, Q, X, Y considered tricky?
These letters are tricky because they break simple patterns. For example, 'g', 'q', and 'y' drop loops below the baseline, which demands extra spatial awareness. The letter 'x' is unique because it needs a pen lift, which can halt your writing flow.
What is the best way to practice tricky cursive letters effectively?
The best way is through focused, consistent repetition. Start by tracing the correct letter form on a worksheet to build muscle memory. Then, practice writing the letter on its own, focusing on smooth strokes. Finally, write it in simple words to master the connections. Short, daily practice sessions are more effective than infrequent, long ones.
How can our free cursive alphabet resources help you master all lowercase cursive letters?
Our website is a complete resource hub for cursive learners. We offer free, printable worksheets for every letter from A to Z, providing step-by-step stroke guidance. Our interactive tools allow you to see how letters connect, and our Cursive Font Generator can inspire you by showing any word in perfect script. It's the ideal place to master all letters for free.
Existe uma ordem específica para os traços das letras cursivas minúsculas G, Q, X, Y?
Sim, absolutamente. Seguir a ordem correta dos traços é crucial para criar uma caligrafia legível e fluida. Por exemplo, o oval das letras 'g' e 'q' deve ser completado antes da cauda descendente. Nossos guias e planilhas de cursivo para imprimir demonstram claramente a ordem correta dos traços passo a passo para cada uma dessas letras difíceis, garantindo que você desenvolva bons hábitos desde o início.