The Rules of Cursive Writing: Connecting Letters Like a Pro
You've learned the individual letters of the cursive alphabet, but now comes the true art: making them flow together seamlessly. What are the rules for cursive writing when it comes to joining letters? Understanding and applying the cursive writing rules for connecting cursive letters is what elevates your script from a series of characters to elegant, flowing cursive handwriting. This guide will unveil the secrets to professional-looking cursive connections, helping you improve cursive flow and write with confidence. For a foundational understanding of the entire alphabet, you might want to review our comprehensive cursive alphabet resources.
The Secrets to Smoothly Connecting Letters
The beauty of cursive lies in its continuous, connected nature. Unlike print, where letters stand alone, cursive thrives on the graceful transition from one letter to the next. But these connections aren't random; they follow established cursive handwriting rules and cursive writing techniques that ensure legibility and aesthetic appeal. Knowing these rules is the first step to mastering fluid script writing rules.
Core Principles for Connecting Cursive Letters Effectively
Before diving into specific connection types, let's establish some foundational principles that govern all good cursive connections. How to connect cursive letters smoothly? It starts here.
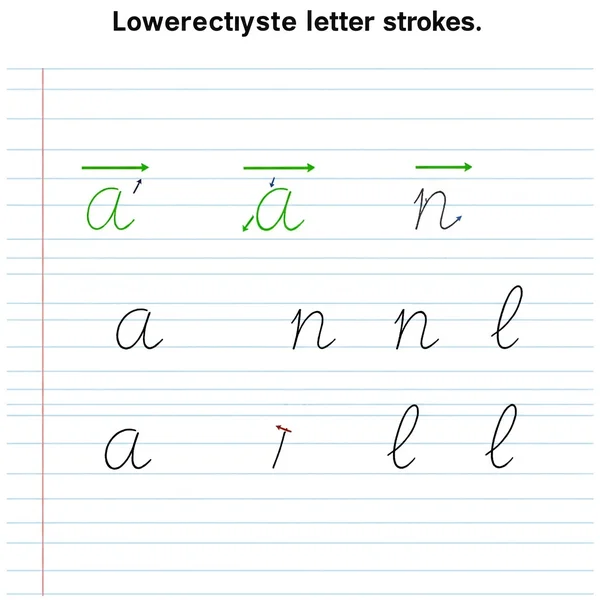
Understanding Entry and Exit Strokes: The Foundation of Cursive Connections
Every lowercase cursive letter is designed with an entry stroke (how it begins or receives a connection from a preceding letter) and an exit stroke (how it ends and prepares to connect to a following letter). Mastering the correct formation of these basic joining strokes for each letter of the cursive writing alphabet is paramount. If the exit stroke of one letter doesn't naturally lead into the entry stroke of the next, your connections will look forced or broken.
Maintaining a Consistent Slant for Harmonious Flow
Why is consistent slant important in cursive? A uniform slant (whether rightward, vertical, or slightly leftward, depending on the style you're learning) across all your letters and cursive connections creates visual harmony and significantly improves readability. Inconsistent slant makes writing look disjointed and difficult to follow, which is counter to good cursive penmanship.
Proper Cursive Letter Spacing Within Words
While cursive letters connect, the spacing between the connected parts of letters and the overall density of letters within a word still matters. Aim for consistent, even spacing. Too cramped, and it's hard to read; too spread out, and the cursive flow is lost. This is a subtle but important aspect of cursive writing rules.
Uniformity in Loop Size and Letter Height
Consistency in the size of your loops (ascenders like 'l', 'h', 'k'; descenders like 'g', 'j', 'y') and the height of your mid-zone letters (like 'a', 'c', 'e', 'm', 'n') contributes to neatness and makes connecting cursive letters easier and more predictable.
Mastering Different Types of Cursive Connections
Not all letters connect in the same way. Understanding the common types of cursive connections will help you navigate the entire cursive alphabet.
Baseline Connections: The Most Common Joining Strokes
Many lowercase letters (like 'a', 'c', 'd', 'e', 'h', 'i', 'k', 'l', 'm', 'n', 't', 'u') end with an exit stroke at or near the baseline, which then swings up to connect to the next letter, also typically starting near the baseline. These are the most frequent basic joining strokes you'll encounter.
Mid-Zone Connections: For Letters Ending Higher Up
Some letters, like 'o', 'v', and 'w', finish their primary stroke in the mid-zone (above the baseline but below the top line). Their exit strokes then connect to the next letter from this higher point. These can be tricky cursive connections for beginners.
Top-Zone Connections: Less Common but Important to Know
Letters like 'b' (in some styles) and 'r' (in some styles, especially after 'o') might appear to connect or lead into the next letter from the top zone. Understanding these variations is part of mastering cursive writing techniques.
Handling Tricky Cursive Connections (e.g., after 'o', 'v', 'w')
Letters ending with a mid-zone or top-zone exit stroke require special attention. For example, after an 'o', the connecting stroke often dips slightly before rising to meet the next letter. Practicing these specific tricky cursive connections repeatedly helps build the necessary muscle memory.
Which Cursive Letters Do Not Join?
One of the key cursive handwriting rules is knowing when not to connect. Which cursive letters do not join?
Identifying Letters That Typically Don't Connect
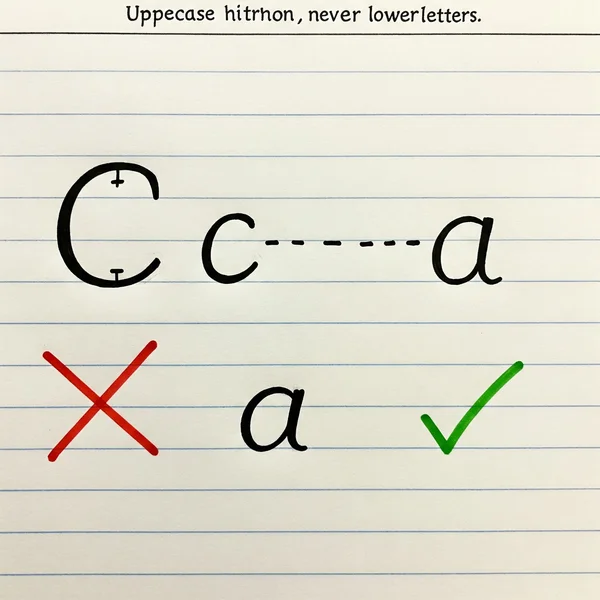
- Capital Letters to Lowercase Letters: In most standard cursive styles, capital letters do not connect to the first lowercase letter of the word. You lift your pen after the capital and start the lowercase letter separately but closely.
- Specific Lowercase Endings: Some older or more formal cursive styles might have specific lowercase letters that don't always connect if they end a word or before certain punctuation. However, in modern, practical cursive, most lowercase letters are designed to connect within words.
- Letters before certain punctuation: You naturally lift your pen before most punctuation marks.
Why Certain Letters Not Join Cursive Script
The primary reason capital letters not join cursive lowercase letters is historical and aesthetic. Capital letters often have more elaborate forms that don't lend themselves to a smooth, natural join with all lowercase entry strokes. The goal is clarity and elegance.
How to Handle Spacing After Non-Joining Letters
When letters don't join (e.g., after a capital), simply leave a small, natural space before starting the next letter. The space should be consistent with the spacing you'd naturally leave between words, or slightly less, to maintain the word's integrity. This requires careful cursive letter spacing.
Techniques to Improve Cursive Flow and Connections
Beyond knowing the rules, certain techniques can help improve cursive flow. How to improve cursive flow?
Practicing Basic Joining Strokes in Isolation
Isolate and practice the common connecting strokes (e.g., the upswing from the baseline, the dip-and-rise from a mid-zone letter). Repetition builds muscle memory for these foundational movements of the cursive writing alphabet.
Word Drills: Focusing on Common Letter Combinations
Make lists of words with frequent or challenging letter combinations and practice writing them repeatedly. This helps you internalize the cursive connections specific to those pairings.
The Role of Light Pressure and Relaxed Grip
A tight grip and heavy pressure hinder cursive flow and make smooth connections difficult. Practice writing with a relaxed hand and light, even pressure on the pen. This is a core principle for good cursive penmanship.
Visualizing the Path: Thinking Ahead as You Write
As you finish one letter, mentally anticipate the path to the next. This "thinking ahead" helps your hand move more fluidly and create more natural joining letters in cursive.
Best Cursive Practice Exercises for Perfecting Connections
Knowing the cursive writing rules is one thing; applying them is another. Are there specific techniques for cursive connections practice?
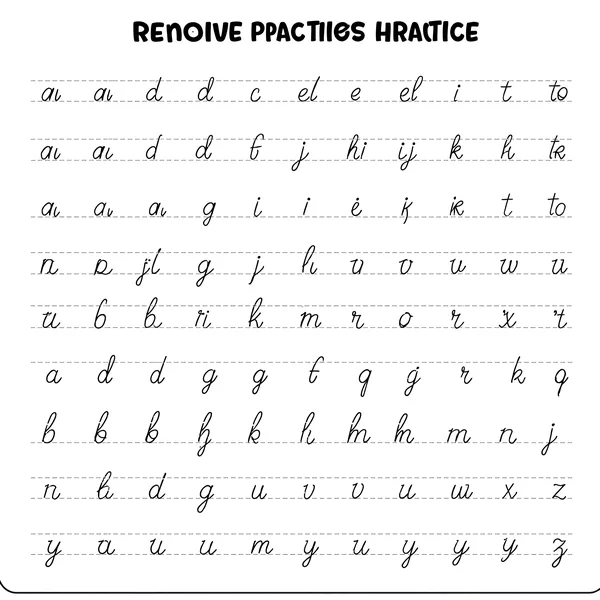
Using Worksheets with Connection-Focused Drills
Look for cursive practice exercises specifically designed to work on connections. These might feature two-letter combinations, short words emphasizing joins, or drills for specific exit/entry strokes. You can find a variety of practice worksheets on our site.
Writing Full Sentences and Paragraphs
Once you're comfortable with individual cursive connections, progress to writing full sentences and then paragraphs. This challenges you to maintain consistency and flow over longer stretches of text.
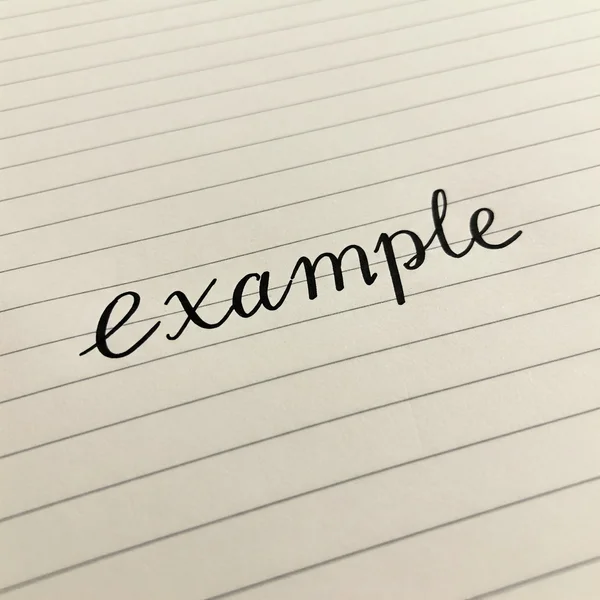
Analyzing and Learning from Well-Written Cursive Examples
Study examples of well-executed cursive. Notice how the letters connect, the consistency of slant and spacing, and the overall rhythm. Try to emulate these qualities in your own cursive practice. Our guides on learning the cursive alphabet often include clear examples.
Unlock Fluent Cursive with These Connection Rules
Mastering the art of connecting cursive letters is what transforms your handwriting into a flowing, elegant script. By understanding the core cursive writing rules, practicing different types of cursive connections, knowing which letters not join cursive, and applying techniques to improve cursive flow, you'll be well on your way to writing like a pro. Remember, consistent and mindful cursive practice is the key to internalizing these rules and making them second nature.
What are the trickiest letter connections for you? Share your challenges or successes in the comments below! We're here to help you on your journey to beautiful cursive handwriting.
Frequently Asked Questions about Cursive Writing Rules & Connections
Let's address some common queries:
What are the most important cursive handwriting rules for connections?
The most crucial cursive handwriting rules for connections include: ensuring correct entry and exit strokes for each letter, maintaining a consistent slant, achieving uniform cursive letter spacing, and knowing when to lift your pen (e.g., after most capital letters).
Do all cursive capital letters connect to the next letter?
No, in most standard forms of the cursive writing alphabet, capital letters do not connect to the following lowercase letter. You complete the capital, lift your pen, and then start the first lowercase letter.
How can I make my cursive connections look more natural?
Practice basic joining strokes repeatedly, focus on a relaxed grip and light pressure, and try to visualize the path of connection before you write. Consistent cursive practice exercises will help your cursive connections become more fluid and less forced over time.
Are there specific rules for connecting letters like 'b', 'o', or 's'?
Yes, letters like 'b', 'o', 'v', 'w', and 's' (and sometimes 'r') have exit strokes that finish in the mid-zone or top-zone, requiring a slightly different connecting stroke to the next letter compared to baseline connectors. For detailed guidance on these, explore our specific letter formation guides.
Where can I find more resources to learn cursive alphabet connections?
You can find many resources, including detailed guides on individual letters (which show entry/exit strokes) and cursive practice exercises focusing on connections, right here as you learn the cursive alphabet with us.