Master Cursive Alphabet Connections: A Flowing Handwriting Guide
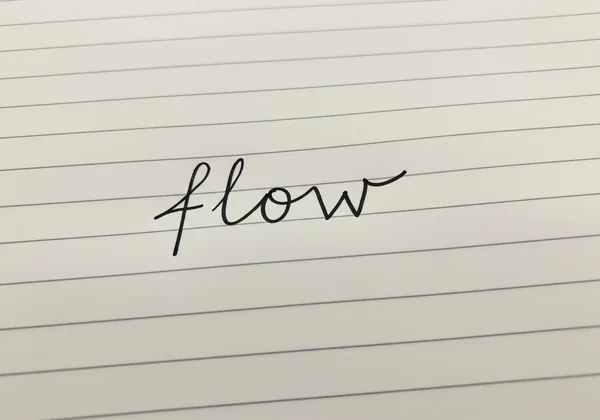
Have you mastered the individual letters of the cursive alphabet, only to find that joining them together feels clumsy and disjointed? Many learners find this is a common hurdle. After perfecting each graceful loop and curve, the real art lies in creating seamless cursive letter connections that make your handwriting beautiful, legible, and truly flow. How can I make my cursive connections look more natural and less forced? This guide is your answer. We will break down the techniques to overcome choppy writing and achieve an elegant style, focusing on tricky letter pairs and the secrets to refined penmanship.
The journey to flowing script is one of practice and understanding the mechanics behind the joins. Whether you're a student aiming for better grades or an enthusiast rediscovering the joy of handwriting, mastering these connections is your next step. To support your practice, you can start learning now with our comprehensive free resources.
Understanding the Fundamentals of Connecting Letters Cursive
Before tackling complex words, it's essential to grasp the basic principles of how cursive letters link together. Think of each letter as having an "entry" stroke and an "exit" stroke. The magic happens when the exit stroke of one letter smoothly transforms into the entry stroke of the next. This creates a continuous, uninterrupted line that is the hallmark of beautiful cursive writing.
Most connections in the English cursive alphabet rely on a few foundational movements. By mastering these, you build the muscle memory required for any combination of letters. This initial focus on fundamentals prevents the development of bad habits and sets you up for success as you move on to more challenging joins.
The Essential Cursive Connection Strokes
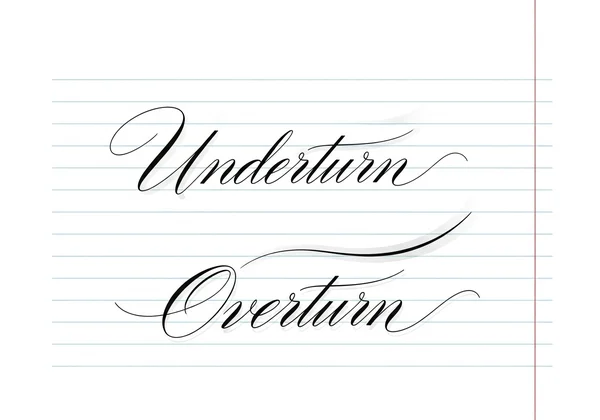
The two most common connection strokes are the underturn and the overturn. The underturn sweeps down and up, like the bottom of a 'u', and is used to connect letters like 'i', 'u', 'w', and 't' to the next letter. The overturn arches up and over, like the top of an 'n', and is used for letters like 'm', 'n', and 'v'.
Beyond these, you have compound curves that combine both motions, often seen in letters like 'h' or 'k'. The key is to recognize the exit stroke of each letter and anticipate how it will flow into the next. Practicing these basic strokes in isolation—drawing lines of underturns and overturns—can dramatically improve your control and rhythm.
Practicing Short and Simple Letter Joins (e.g., 'oe', 'in', 'us')
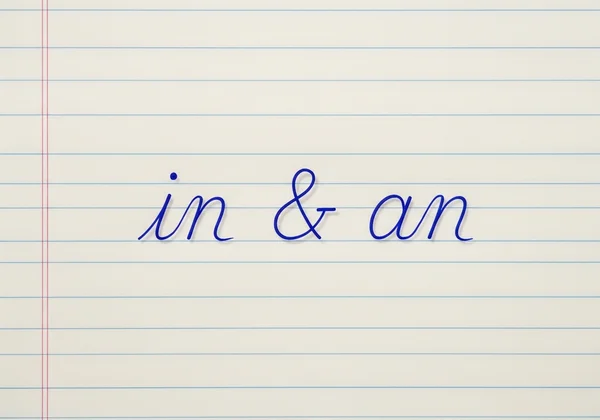
Begin your practice with letter pairs that connect naturally and easily. Combinations like 'in', 'an', 'is', and 'us' are excellent starting points because the exit stroke of the first letter is at the baseline, leading perfectly into the baseline entry of the second. These simple joins help you build confidence and get a feel for maintaining a consistent flow.
Another group of simple joins involves letters that end with an overturn connecting to letters that start with an underturn, such as 'me' or 'ne'. Focus on making the transition between the two shapes as smooth as possible, without any sharp angles. You can find detailed guides for each letter on our cursive alphabet chart to see exactly how these connections are formed.
Conquering Tricky Cursive Pairs for Seamless Flow
Once you are comfortable with the basics, it's time to address the letter combinations that often trip up learners. These "tricky pairs" typically involve a significant change in direction or height between letters. Mastering them is the key to unlocking a truly fluid and effortless handwriting style. With focused practice, even the most awkward-looking joins will become second nature.
The challenge with these pairs isn't about speed; it's about control and precision. Slow down your writing, focus on the path your pen takes, and analyze where the connection feels unnatural. Our interactive tools can provide the visual guidance you need to perfect these specific movements.
Navigating Awkward Upstroke Connections (e.g., 'b', 'o', 'v', 'w' leading into other letters)
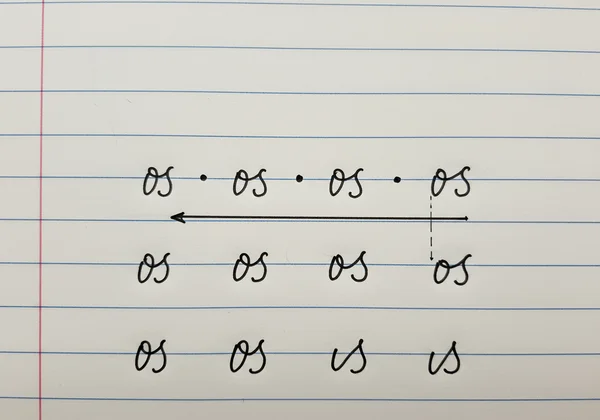
Letters that finish their stroke at the top or middle line, such as 'b', 'o', 'v', and 'w', are notoriously difficult to connect. Unlike baseline connectors, these require a small, often horizontal, stroke to bridge the gap to the next letter. For example, the exit stroke of an 'o' or 'w' is a small flick to the right that must meet the next letter at its starting point.
When connecting 'br' or 'os', the challenge is to manage the height transition gracefully. Practice these pairs repeatedly, focusing on the small bridge stroke. The goal is to make this connector look intentional and elegant, not like an accidental scribble. Using our printable cursive worksheets allows for focused repetition on these difficult combinations.
Smoothly Joining Letters with Loops and Descenders (e.g., 'g', 'j', 'y', 'z')
Letters with descending loops that drop below the baseline ('g', 'j', 'y', 'z') present a unique challenge. After completing the loop, the stroke must travel back up to the baseline to connect to the next letter. This upward stroke should be parallel to the main slant of your writing to maintain a consistent and tidy appearance.
A common mistake is making the connecting upstroke too steep or too shallow, which disrupts the visual rhythm of the word. For pairs like 'gy' or 'jo', concentrate on finishing the entire loop of the first letter before beginning the graceful ascent to the second. This continuous motion is crucial for maintaining the cursive flow.

Maintaining Consistent Spacing and Slant for Enhanced Legibility
Perfect connections are only part of the equation for beautiful cursive. The space between your letters and the uniform slant of your writing are just as important for legibility and aesthetic appeal. Your letter connections directly influence spacing; if your connecting strokes are too long, your words will look stretched out, and if they are too short, the letters will appear cramped.
Aim for a consistent, forward-leaning slant in all your strokes, including the connectors. Use lined paper as a guide and consciously work on making your letters parallel. This uniformity creates a pleasing visual harmony and makes your writing much easier to read. Consistent practice with our A to Z cursive guides will help instill this habit.
Developing Your Natural, Smooth Cursive Writing Style
As you move from mechanical practice to fluent writing, the focus shifts from just making correct connections to developing a personal, smooth style. This stage is about internalizing the movements so they become automatic, allowing your hand to glide across the page. It’s where handwriting transforms from a task into a form of personal expression.
This level of mastery requires a deeper understanding of the physical dynamics of writing. It involves more than just letter shapes; it's about rhythm, pressure, and the continuous dance of the pen. With dedication, you'll develop a smooth cursive writing style that is uniquely yours.
The Role of Pen Pressure and Continuous Motion in Cursive Flow
True cursive flow comes from maintaining continuous motion and varying your pen pressure. Traditional calligraphy emphasizes applying slightly more pressure on downstrokes (the strokes moving toward you) and less pressure on upstrokes (the strokes moving away). This creates an elegant contrast between thick and thin lines that adds character to your writing.
Even with a standard pen, you can practice this principle by focusing on a light touch for all connecting strokes and upward movements. The goal is to keep the pen moving in a constant, rhythmic way, almost like you are drawing one long, intricate line to form a word. This continuous motion is the heart of effortless cursive. Our platform, Cursive Alphabet, provides tools to help you visualize this flow.
Daily Drills and Focused Practice for Cursive Consistency
There is no substitute for consistent practice. Spending just 15-20 minutes each day on focused drills will build muscle memory far more effectively than one long session per week. Create drills that target your specific weaknesses. If you struggle with connecting 'o' and 's', write the word "rose" or "pose" repeatedly until the motion feels natural.
Practice writing full sentences and paragraphs from a book or your favorite quotes. This forces you to handle a wide variety of letter connections in a real-world context. The more you write, the more your brain and hand will learn to work together, leading to greater cursive consistency and a style you can be proud of. Explore our free learning tools to find endless practice material.
Your Journey to Beautiful, Connected Cursive
Mastering cursive letter connections transforms your handwriting from a series of separate characters into a fluid, elegant script. By understanding the fundamental strokes, conquering tricky pairs through focused practice, and developing a natural rhythm, you can achieve the beautiful, flowing handwriting you've always admired. Remember that consistency is more important than intensity.
The key is to be patient with yourself and to use the right resources to guide your practice. Start today by applying these techniques, and you will see a remarkable improvement in your cursive writing. Visit Cursive Alphabet to access a complete library of free worksheets, interactive guides, and even a cursive font generator to inspire your journey.
Frequently Asked Questions About Cursive Letter Connections
How can I make my cursive connections look more natural and less forced?
Natural-looking connections come from a relaxed grip and a focus on rhythm rather than perfection. Instead of drawing each letter, try to feel the flow of the entire word. Practice continuous motion drills, like writing waves or connected loops across a page, to help your hand learn to move smoothly and consistently.
What are some of the most challenging letter pairs to connect in cursive?
Some of the trickiest pairs involve letters that end high connecting to others, such as 'br', 've', 'os', and 'wo'. Another challenging group involves connecting from a descending loop into a letter, like 'ge' or 'yj'. Breaking these pairs down and practicing them slowly with resources like our online practice tool is the best approach.
Is it ever okay to lift your pen when writing in cursive?
The goal of cursive is to write words in a single, continuous stroke, so you should not lift your pen between letters. The only exceptions are for finishing touches after a word is complete, such as crossing a 't' or 'x', and dotting an 'i' or 'j'.
How long does it typically take to learn to write smooth cursive?
The timeline varies for everyone, but with consistent daily practice of about 15-20 minutes, most learners see a significant improvement in their flow and connections within a few weeks. Using structured resources and focusing on your specific challenges can accelerate your progress. Our cursive practice sheets are designed to help you improve efficiently.