How to Write Neatly in Cursive: 7 Actionable Tips
Do you admire beautiful, flowing cursive but find your own attempts fall short of that ideal? You're not alone! Many learners master the basic cursive alphabet but still struggle with how to how to write neatly cursive. The good news is that achieving neat cursive and even perfect cursive handwriting is often a matter of focusing on a few key details and consistent cursive practice. This guide offers 7 actionable cursive writing tips to help you significantly improve cursive handwriting and develop a script that is both beautiful and legible cursive writing. Ready to transform your penmanship improvement journey? For foundational practice, don't forget to explore our cursive practice sheets.
Unlock Perfect Script: 7 Tips for Neat Cursive Handwriting
Achieving neat cursive handwriting isn't about innate talent; it's about conscious effort and applying proven techniques. These seven tips address the most common areas where handwriting can become messy, providing you with a clear path to improve cursive handwriting.
Why Striving for Neat Cursive Matters
Before diving into the tips, let's briefly touch upon why neat cursive is a worthy goal. Legible and aesthetically pleasing cursive makes your writing more enjoyable to read, whether it's a personal journal, a letter to a friend, or notes for work or study. It conveys care and attention to detail. Moreover, the process of striving for handwriting neatness can itself be a mindful and rewarding activity, enhancing your overall learn cursive experience.
Tip 1: Maintain a Consistent Slant for Visual Harmony
One of the quickest ways to improve cursive handwriting is to ensure all your letters slant in the same direction and at a similar angle. Why is my cursive messy? Inconsistent slant is a common culprit.
Understanding Slant: Right, Left, or Upright?
Most traditional English cursive slants to the right. However, some people naturally write with an upright (vertical) slant or even a slight leftward slant. The key isn't which slant you choose, but that you apply it consistently to every letter.
Using Slant Lines on Practice Paper
Many cursive practice sheets come with pre-printed diagonal slant lines. Use these as a guide. If your paper doesn't have them, you can place a ruled sheet with slant lines underneath your writing paper or lightly draw your own.
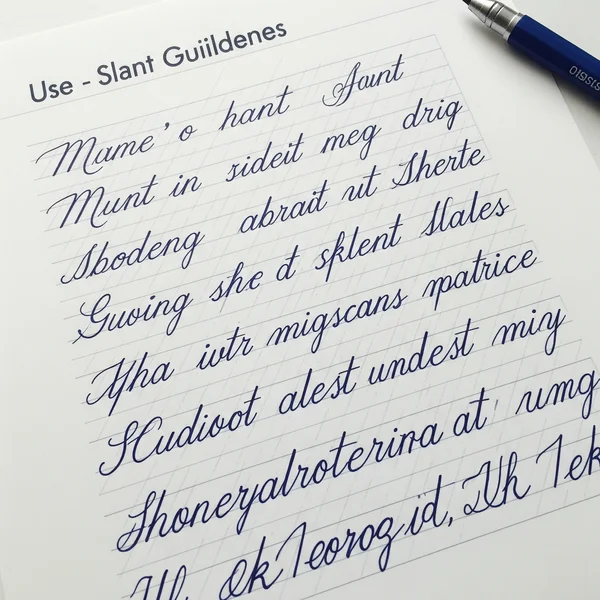
Checking Your Slant Regularly
Periodically pause your cursive alphabet practice and look at your writing. Are all the downstrokes parallel? Making this a conscious check will help build cursive consistency.
Tip 2: Master Proper Spacing – Between Letters and Words
Even with perfectly formed letters, incorrect spacing can make your cursive look cluttered or disjointed. How to make cursive legible? Proper spacing is essential.
Consistent Gaps: Avoiding Crowding and Drifting
The space within letters (like inside an 'o' or 'a') and the space between connected letters should be relatively uniform. Avoid letters either crashing into each other or drifting too far apart, which disrupts the neat cursive flow.
The "o" Rule for Word Spacing
A common guideline for spacing between words is to leave enough space to fit a lowercase 'o' from your own handwriting. This helps ensure words are clearly distinct, contributing to legible cursive writing.
How Spacing Impacts Legible Cursive Writing
Good proper spacing makes your cursive easier on the eyes and significantly improves readability. It allows each word to stand out clearly.
Tip 3: Aim for Uniform Letter Size and Proportion
Inconsistent letter size is another major factor that detracts from perfect cursive handwriting.
The Importance of the Baseline and Midline
Pay close attention to the baseline (the line your letters sit on) and the midline (which typically dictates the height of your lowercase x-height letters like 'a', 'c', 'e', 'm', 'n', 'o', 'r', 's', 'u', 'v', 'w', 'x', 'z').
Keeping Your x-Height Consistent
The "x-height" is the height of your main lowercase letters. Strive to keep this height uniform letter size across all these letters. This creates a visually pleasing rhythm.

Proportional Ascenders and Descenders
Ascenders (the parts of letters like 'b', 'd', 'h', 'k', 'l', 't' that go above the midline) and descenders (the parts of 'g', 'j', 'p', 'q', 'y', 'z' that go below the baseline) should also be of a consistent and proportional height/depth.
Tip 4: Practice Controlled Loops – Ascenders and Descenders
Loops in cursive can be beautiful, but uncontrolled or inconsistently sized loops can make writing look messy. Mastering controlled loops is a key cursive writing tip.
Avoiding Overly Large or Too-Small Loops
Loops that are too big can collide with lines above or below, or with adjacent letters. Loops that are too small or pinched can look like mistakes or be hard to read. Aim for a consistent, open shape.
Ensuring Loops are Closed and Well-Formed
Ensure your loops are properly closed where they should be (e.g., the top of an 'l' or the bottom of a 'g'). Incomplete loops contribute to a sloppy appearance.
Drills for Loop Control
Practice writing rows of letters with loops, focusing solely on making the loops uniform in size and shape. Specific cursive practice sheets often focus on these.
Tip 5: Slow Down Your Pace for Precision
When you're trying to improve cursive handwriting, especially for neatness, speed is not your friend initially.
Deliberate Practice vs. Rushed Writing
Resist the urge to write quickly. Slow practice allows your brain and hand to coordinate more effectively, focusing on forming each stroke correctly.
Focusing on Each Stroke
Pay attention to every upstroke, downstroke, curve, and loop. Conscious, deliberate movement is key to penmanship improvement.
How Speed Develops Naturally from Accuracy
Once you can consistently form neat letters and connections slowly, speed will gradually increase without sacrificing quality. Accuracy first, then speed.
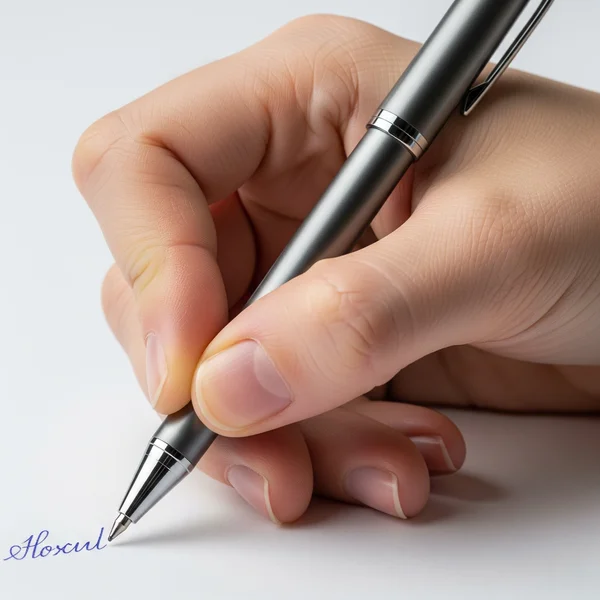
Tip 6: Choose Quality Tools – The Right Pen and Paper
The tools you use can impact your ability to how to write neatly cursive. What's the best pen for neat cursive?
Pens that Promote Smooth Writing
A pen that glides smoothly across the paper with consistent ink flow makes it easier to form controlled strokes. Gel pens, rollerball pens, or well-maintained fountain pens are often good choices. Avoid scratchy or blobby pens.
Paper with Appropriate Lining or Texture
Good quality paper with a smooth (but not too slick) surface is ideal. Lined paper, especially with a midline, is highly recommended for cursive alphabet practice to guide letter height and alignment.
How Tools Can Affect Your Neat Cursive Output
While a skilled writer can produce neat handwriting with basic tools, good quality tools can make the process more enjoyable and support your efforts, particularly when learning.
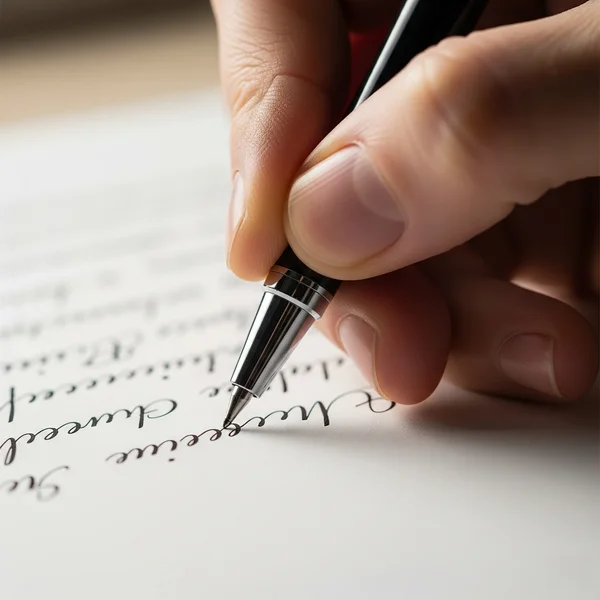
Tip 7: Adopt Good Posture and a Relaxed Pen Grip
Your physical approach to writing plays a significant role in the outcome.
Sitting Correctly at Your Desk
Sit upright with your feet flat on the floor. Ensure your desk is at a comfortable height. Good posture allows for better control and reduces fatigue.
The Tripod Grip and Avoiding Tension
Hold your pen with a relaxed tripod grip (between your thumb and forefinger, resting on your middle finger). Avoid gripping too tightly, as this leads to tension, fatigue, and less controlled strokes.
Allowing Arm Movement, Not Just Fingers
For smoother, more flowing cursive, try to use your whole arm for movement, not just your fingers or wrist. This allows for larger, more graceful strokes and helps with cursive consistency.
The Mindset for Continuous Improvement in Your Neat Cursive
Achieving and maintaining neat cursive is an ongoing process.
Patience and Perseverance
Don't expect perfect cursive handwriting overnight. Be patient with yourself and celebrate small improvements along the way. Consistent cursive practice is cumulative.
Celebrating Small Improvements
Notice when your slant is more consistent, or your loops are neater. Acknowledging progress keeps you motivated to continue your penmanship improvement.
Transform Your Cursive with These Neatness Tips
Learning how to write neatly cursive is within your reach. By consciously applying these seven actionable cursive writing tips – focusing on consistent slant, proper spacing, uniform letter size, controlled loops, a deliberate pace, quality tools, and good posture – you can dramatically improve cursive handwriting. Remember that dedication to cursive practice and attention to these details are what build beautiful, legible cursive writing.
Which of these tips do you think will make the biggest difference in your cursive? Or do you have other neat handwriting secrets to share? Let us know in the comments! For more resources, including practice sheets to help you hone these skills, visit our comprehensive cursive learning hub.
Frequently Asked Questions on Achieving Neat Cursive Handwriting
Here are some common questions people ask when aiming for neater script:
How long does it take to make my cursive neater?
The time it takes to improve cursive handwriting varies per individual and depends on current skill, practice frequency, and focus. With consistent, mindful cursive practice applying these tips, you could see noticeable improvements in a few weeks to a few months.
Is it better to practice individual letters or words for neatness?
Both are important. Start with individual letters to ensure correct formation, then move to words to practice connections and spacing. Alternating between them can be effective for overall handwriting neatness.
My cursive used to be neat; how can I get it back?
Often, cursive neatness declines due to rushing or lack of practice. Revisit the fundamentals covered in these cursive writing tips, slow down, and dedicate regular time to cursive practice sheets. Your muscle memory will likely return.
What's the single most important tip for neat cursive?
While all tips are important, consistency (in slant, size, and spacing) is arguably the most impactful single factor for achieving neat cursive. You can find tools and guides to help with this on many cursive alphabet learning platforms.
Are there specific exercises to improve cursive handwriting neatness?
Yes, drills focusing on individual strokes (ovals, upstrokes, downstrokes, loops), consistent slant lines, and letter/word spacing exercises available on cursive practice sheets are excellent. Explore the variety of exercises available here to find what suits you.