How to Teach the Cursive Alphabet to Kids: A Complete Guide
As a parent or educator in today's fast-paced digital world, you might find yourself facing a unique challenge: teaching the timeless art of cursive handwriting. You know the value it holds—enhancing fine motor skills, improving memory retention, and connecting children to a rich history of communication. But the big question remains: how to teach cursive in a way that’s engaging, effective, and doesn't feel like a chore? You’re likely looking for structured, high-quality resources that won’t break the bank, and you've come to the right place.
This guide is designed to walk you through a simple, step-by-step process for teaching the cursive alphabet to children. We'll provide actionable tips, proven methods, and introduce you to free tools that make learning successful and fun. With the right approach, you can transform handwriting practice from a tedious task into a creative adventure. Ready to begin? You can explore our resources now.

Getting Started: Your Cursive Lesson Plans
A successful journey begins with a clear map. The most effective way to teach cursive is not by tackling the entire alphabet at once, but by breaking it down into manageable phases. A structured lesson plan helps build a strong foundation, ensuring that each new skill is built upon a previously mastered one. This methodical approach prevents overwhelm and builds confidence in young learners.
Pre-Writing: Building Foundational Motor Skills
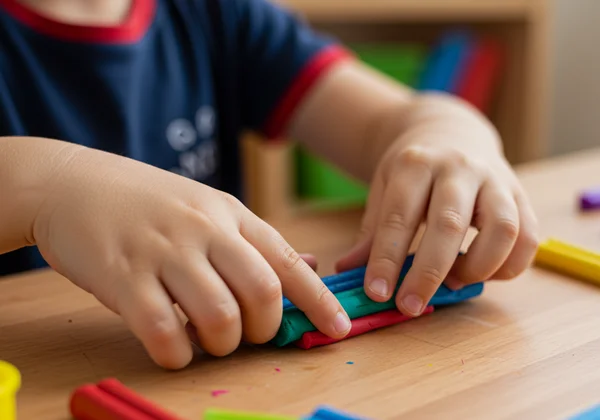
Before a child even picks up a pencil to write their first cursive letter, they need to develop the fine motor skills required for the fluid, connected movements of handwriting. This pre-writing phase is crucial. It prepares the small muscles in their hands and fingers for the control and dexterity needed for elegant letter formation.
Think of it as the warm-up before the main event. Encourage activities that strengthen these muscles, such as:
-
Playing with clay or modeling dough.
-
Tracing shapes, patterns, and mazes.
-
Using scissors to cut along lines.
-
Stringing beads or lacing cards.
-
Finger painting to practice fluid motions.
These activities are not just play; they are essential for developing hand-eye coordination and muscle memory, paving the way for a smoother transition to writing the actual cursive letters alphabet.
Phase 1: Introducing Lowercase Letter Groups
Once foundational motor skills are in place, it’s time to introduce the letters themselves. Instead of teaching them in alphabetical order (a, b, c), a more effective pedagogical approach is to group lowercase letters by their initial stroke. This helps children recognize patterns and master specific movements before moving on to new ones.
For example, you can create groups like:
-
Wave Letters (Over-and-under strokes): i, u, w, t, r, s, j, p
-
Loop Letters (Up-and-down loops): e, l, h, k, b, f
-
Curve Letters (C-like strokes): c, a, d, g, q, o

Starting with lowercase letters is generally recommended as they make up the vast majority of written text. By focusing on one group at a time, children can practice a single type of motion until it becomes second nature. Our printable cursive alphabet worksheets are designed to support this learning method.
Phase 2: Mastering Uppercase Letters and Connections
After your child has a solid grasp of the lowercase alphabet, you can introduce the uppercase letters. Many uppercase cursive letters are similar to their print counterparts, just with a bit more flair, which can make them easier to learn. Practice each one individually before moving on to the most crucial step in cursive writing: the connections.
The ability to seamlessly connect letters is what defines cursive. Teach children how the "exit stroke" of one letter flows directly into the "entry stroke" of the next. Start with simple two-letter combinations like 'at', 'in', or 'on'. Then, gradually move to more complex pairings. This is where consistent practice using a cursive alphabet chart for reference becomes invaluable.
Phase 3: Writing Words and Sentences
With individual letters and connections mastered, your child is ready to write full words and sentences. Begin with short, familiar words, especially their own name. This provides a powerful sense of accomplishment and personal connection to the skill.
From there, progress to short, simple sentences. You can use phrases from their favorite books or fun, silly sentences to keep them engaged. To make practice even more relevant, you can use a tool to create practice sentences in a perfect cursive style for them to copy. This final phase solidifies their skills and demonstrates the practical beauty of cursive handwriting.
Essential Tips for Teaching Handwriting
Having a great lesson plan is the first step, but how you conduct the practice sessions makes all the difference. These essential tips focus on the physical and motivational aspects of teaching handwriting, ensuring the experience is positive and productive for both you and your child.
Correct Posture and Pencil Grip
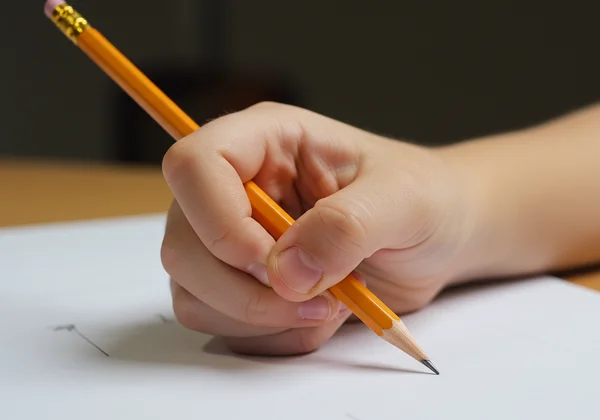
The physical foundation of good handwriting starts with how a child sits and holds their pencil. Poor posture can lead to fatigue and sloppy writing. Encourage your child to sit up straight in their chair, with both feet flat on the floor and their non-writing hand stabilizing the paper.
The pencil grip is equally important. The "tripod grip" is widely recommended: the pencil rests between the thumb and index finger, with the middle finger supporting it from below. This allows for maximum control and fluid movement without straining the hand.
Focusing on a Consistent Slant and Spacing
Two hallmarks of beautiful, legible cursive are a consistent slant and even spacing between letters and words. Most cursive styles have a slight forward slant. You can draw light diagonal lines on the practice paper to help guide them.
Spacing can be tricky for beginners. A simple tip for word spacing is to teach them to leave a space the width of their pinky finger between words. Our our lined worksheets are specifically designed with guides to help learners master both slant and spacing.
How to Keep Practice Sessions Short and Fun
A child's attention span is limited, and forcing long, arduous practice sessions is the quickest way to create frustration. Keep practice sessions short, focused, and positive—aim for 10 to 15 minutes a day. Consistency is more important than duration.
End each session on a high note, perhaps after they've beautifully written a specific letter or word. Use positive reinforcement and praise their effort, not just the result. This builds a positive association with cursive and keeps them motivated to continue their learning journey.
Using Printable Cursive Activities to Motivate
The key to keeping kids engaged is to make learning feel like play. Worksheets and drills have their place, but incorporating fun, printable cursive activities can reignite a child's interest and show them the creative possibilities of their new skill. This is where our resources can truly shine.
Download Our Free A-to-Z Cursive Alphabet Worksheets
The cornerstone of effective practice is high-quality materials. We offer a comprehensive set of free, downloadable worksheets covering the entire cursive alphabet from A to Z. Each sheet is carefully designed with clear instructions, traceable letters, and ample space for independent practice.
These worksheets are perfect for reinforcing the lessons in your plan, from individual letter formation to connecting letters into words. Having an unlimited supply of fresh practice sheets means you never have to worry about running out. Get started today with our free A-to-Z worksheets.
Creative Games with Lettering and Words
Take practice beyond the worksheet with these fun ideas:
- Write a Secret Message: Have your child write a secret message or a joke in cursive for a family member to decode.
- Cursive Treasure Hunt: Write clues in cursive and hide them around the house.
- Personalized Bookmarks: Let them design and write their name in cursive on a bookmark.
- Thank-You Notes: Encourage them to write thank-you notes for gifts in their best cursive.
You can also use our versatile cursive font generator to create custom game materials, like a list of spelling words or a Cursive Bingo card. These activities show children that cursive is not just an exercise but a useful and beautiful skill. With these tips and our free tools, you're ready to make handwriting a creative adventure for your child.
Frequently Asked Questions About Teaching Cursive
What is the best way to start teaching cursive?
The best way to start is by building a strong foundation. Begin with pre-writing activities to develop fine motor skills. Then, introduce lowercase letters in groups based on their strokes (e.g., wave letters, loop letters) before moving to uppercase letters and connections. This phased approach, supported by our interactive learning tools, makes the process logical and less intimidating.
How can I make learning cursive fun for my child?
To make learning fun, turn practice into play. Keep sessions short (10-15 minutes), use colorful pens or pencils, and incorporate games like writing secret messages or creating custom art with their name. Using motivating resources, like our free printable worksheets and the cursive font generator, can transform a learning task into a creative activity they look forward to.
At what age should a child typically learn cursive?
Most children are ready to learn cursive around ages 7 to 9, typically in the second or third grade. At this stage, they have usually mastered printing and have the necessary fine motor control. However, readiness is more important than age. Look for signs that your child has good pencil control and can write their print letters neatly. Our resources are designed to be adaptable for learners of all ages who are ready to explore all resources.